Installing a new rotor on your Tower ebike is a fairly simple, straightforward process, but does require the correct tools and a little bit of knowledge. But we will walk through exactly what you need and the process to get it mounted on!
Here is a video walking through the process:
The tools you will need for this will be:
- T25 Torx Wrench
- Torque Wrench with T25 Torx Head
- 15mm/18mm Wrench
- Bike Stand/Way to Hold up the Ebike

Here is the process:
- First, remove the wheel using either the 15mm for the front wheel, or 18mm for the rear wheel.
- Once the Wheel has been removed, lay it down with the rotor side facing up.
- Using the T25 Torx wrench, remove the old rotor bolts. They may be pretty tight on there, so it may take some effort. Make sure you are pressing down while taking them off to ensure the Torx head does not pop out and strip the bolt.
- Once all the bolts have been removed, remove the old rotor.
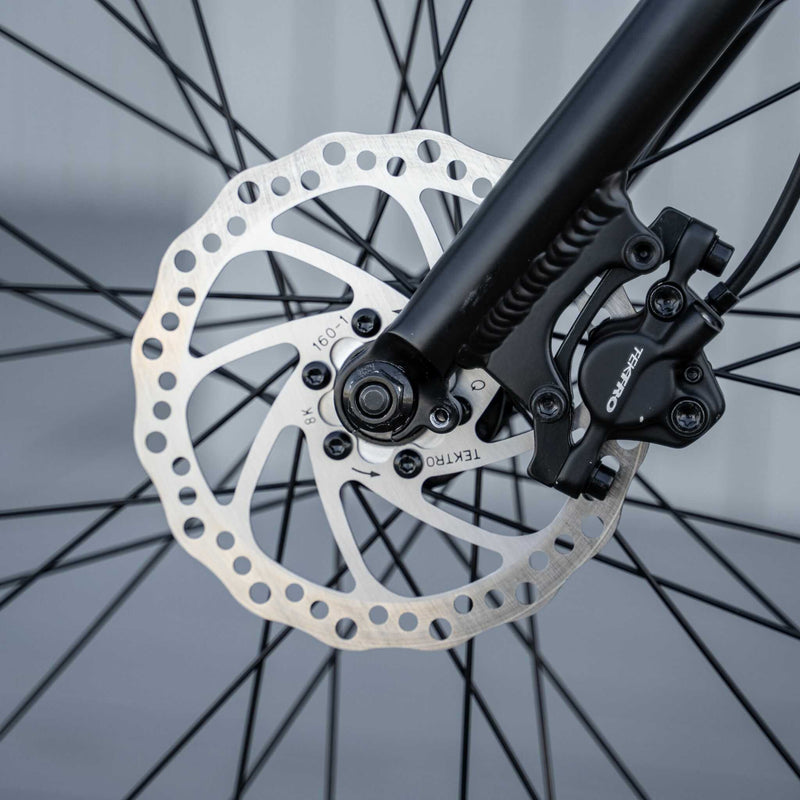
- Place the new rotor over the 6-bolt holes, making sure the orientation is correct. There will be rotation arrows on one of the sides of the rotor. Make sure that the arrow is going in the direction the wheel would rotate on the bike.
- Once the rotor is oriented correctly on the wheel, start threading in the bolts one by one. Do not tighten/torque them down all the way, just get them all partially threaded in. Always use new rotor bolts when installing a new rotor. The new rotor will typically come with new bolts.
- Once all the bolts are thread in, start tightening them down a couple rotations at a time. When moving on to the next bolt, be sure to do this in a star pattern like the picture below. This will ensure even distribution of the bolts on the rotor. Once all of the bolts have been tightened down, get the torque wrench set to 4-6 nm.
- Begin torquing the bolts down in the same pattern as we drove them in.
- Reinstall the wheel using either the 15mm or 18mm wrench.
The new rotor is now installed onto your wheel! Please note, the disc brake caliper may have to be readjusted with the new rotor install. Please see the Hydraulic Brake Adjustment section.
Everything DIY E-Bike Repairs
Homepage: eBike Repair Guide
eBike Repair Basics & Assembly
- eBike Specs and Walkthrough
- Tower eBike Serial Numbers
- Recommended Tools eBike Repairs at Home
- eBike Operation Guide
- Initial Build of a Tower eBike
- Tower eBike Torque Specs
- eBike Care and Maintenance
- Quick Reference eBike Repair Guide
eBike Brake System Service Guide
- eBike Hydraulic Brake System Introduction
- How to Adjust an eBike's Hydraulic Brakes
- How to True an eBike Rotor
- E-Bike Brake Rotor Install
- Brake Pad Install for E-Bikes
- How to Resurface eBike Brake Pads and Rotors
- How to Bleed Hydraulic Brakes on an eBike
eBike Drivetrain Service Guide
- How to Clean Your eBike Drivetrain
- Shifting Adjustment on an E-Bike
- Electric Bike Shifter Cable Install
- How to Install a New Chain on an eBike
- E-Bike Derailleur Installation
- Replace the Shifter on an E-Bike
- Replace an Electric Bike Cassette
- Crankset Install on an E-Bike
- E-Bike Derailleur Hanger Adjustment
- Installing Pedals on an Electric Bike
eBike Wheels & Tire Guide
- Flat Tire Repair on an Electric Bike
- New Tire Install on an Electric Bike
- Rear Wheel (with Hub Motor) Removal Guide
- How to True E-Bike Wheels
- Electric Bike Spoke Replacement
eBike Electric Repair Guide
- E-Bike Electrical System Overview
- Intro to Electrical Troubleshooting an eBike
- Methods of Electrical Troubleshooting an eBike
- Electric Bike Error Codes
- Electric Bike Battery Services
- Electric Bike Motor Issues
- E-Bike Will Not Power On
- Troubleshooting Pedal Assist on an E-Bike
- No Throttle Power eBike Troubleshooting
- E-Bike Does Not Pedal Assist or Throttle
- Intermittent Power Loss While Riding an eBike
Miscellaneous eBike Service Guide